Your first model part 2
Your first model
FOAM models have Java-style package names, like com.todo.model.Todo. We’re
going to create a Java-style directory structure to match.
Make a chain of new directories, so that your PROJECT directory looks like this:
PROJECT
|- foam/
|- js/
|--- com/
|----- todo/
|------- model/
|--------- Todo.js
Then open PROJECT/js/com/todo/model/Todo.js using your favourite editor.
Into this file, we’ll put our first model: a simple todo list item.
The Todo model
We’ll start small: an id, a title and a boolean isCompleted.
Write the following into the file:
CLASS({
  package: 'com.todo.model',
  name: 'Todo',
  properties: [
    {
      name: 'id'
    },
    {
      name: 'title'
    },
    {
      type: 'Boolean',
      name: 'isCompleted'
    }
  ]
});
This is pretty straightforward. CLASS() is a built-in function provided by
FOAM that declares a new model. It gets passed a Javascript object that
describes the model.
Remeber, models are data, not code, and so we build them with data structures, not syntax.
Where’s the code?
This doesn’t really contain any code, it’s more like a database schema or empty class definition.
But there’s enough information here for FOAM to go a long way towards a working app. In fact, let’s load our app using one of FOAM’s reusable controllers.
Almost done?
Our app is now remarkably complete.
Note that your data won’t be saved across refreshes. We’ll fix that in Part 4, so don’t worry about it for now.
It’s not done yet – there are things we’ll want to customize and clean up. But it’s come a long way already, from just the model.
How it works
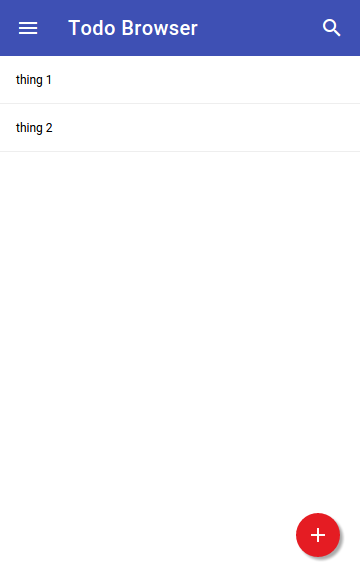
We’re using one of FOAM’s more powerful components, a reusable controller called the Browser.
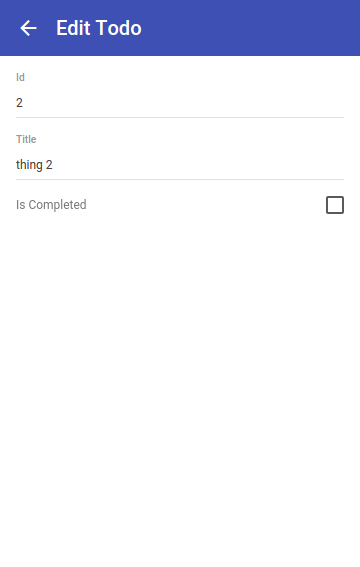
The Browser captures a common pattern for apps, especially on mobile: a list of items, which you can tap to see and edit their details.
The Browser is very customizable, but there’s only one required parameter: the
model we’re viewing.
Let’s examine the parameters we passed to FOAM’s index.html in order to load our app.
model_=foam.browser.u2.BrowserControllerThis is the main model we wantindex.htmlto instantiate and display for us.BrowserControlleris the top-level model for the Browser.model=com.todo.model.Todohere we set themodelproperty of theBrowserControllerto the todo item model we defined above. The Browser looks at themodelto see what the objects we want to browse look like.
This is the essence of FOAM. Instead of writing code to implement all the Browser’s features for your app, we write them in a generic way that can be reused by many apps.
With just a model and the Browser, our nascent app can create new todos, edit existing ones, and search-as-you-type. Soon we’ll have it persisting in LocalStorage, and then on a server.
Views are Evolving
FOAM currently has two view libraries.
- We call the original “U1”. Its models live in
foam.ui.*and similar. - The replacement, still under development, is called “U2”. Its models live in
foam.u2.*and similar.
The two have different template syntax. Each can embed views from the other if needed, but apps fit together more neatly if they stick to one or the other.
U2 is sufficiently stable and complete to serve for this tutorial, so we use it here.
You’re still steering
FOAM can give you as much or as little help as you like. If your app doesn’t fit the Browser’s list-and-details pattern, you don’t need to use it at all.
FOAM has other reusable controllers for other patterns, and you can of course write your own if needed.
If you want a completely different look, you can replace the BrowserView
altogether.
FOAM doesn’t force you into anything. If you don’t like one of our views, replace it with one of your own. Every component can be replaced, and any components you write will still fit together neatly with the built-in components.
FOAM’s goal is to make many things much easier, but also to make nothing harder.
Next
Next we’ll start customizing our app to make it more usable in Part 3: Wiring.